
1 — Installation Steps
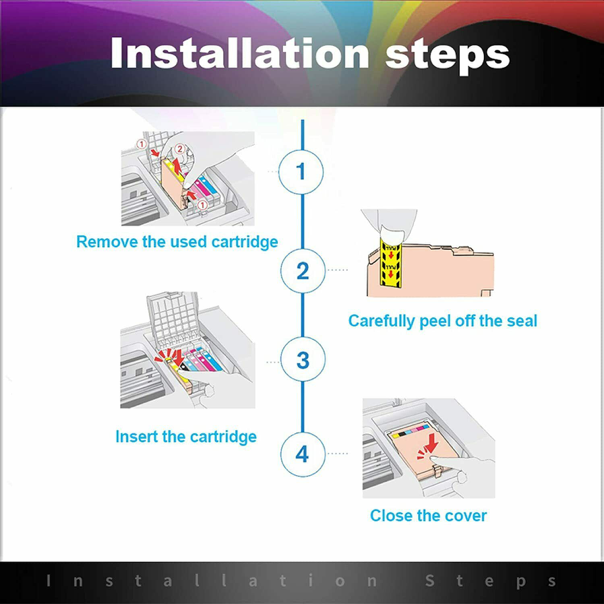
- Remove the used ink cartridge;
- Carefully peel off the seal;
- Insert the cartridge;
- Calose the cover;
Note: Please keep the printer power on while you replace ink cartridges.
2 — Installation Notes & Tips
* Please make sure you have your replacement cartridges handy before you begin. It is strongly suggested that you install new Inkzoo ink cartridges immediately after removing the old ones, otherwise the print head may dry out and be unable to print normally.
* Before opening the new ink cartridge package, shake it gently three or more times. However, please do not shake the cartridges after opening the packages to avoid ink leaks.
* After removing the cartridge from the package, please do not touch the chip on the cartridge to keep good electrical conductivity. * Remove the yellow tape with “PULL” only from the side of the cartridge. Do not remove any other labels or seals, otherwise ink will leak.
* As compatible ink cartridges, sometimes the cartridges may not be recognized by your printer after your replacement initially. You may resolve this problem just by following 1) to 4) steps below:
1) Keep your printer power on;
2) Take the unrecognized ink cartridge out;
3) Install the ink cartridge back again;
4) Check the recognition status after one or more minutes;
If it does not work even though a couple of times trying from 1) to 3), please contact your retailer for assistance.
Warning: If ink gets on your skin, wash it thoroughly with soap and water. If ink gets into your eyes, flush them with water immediately. If ink gets into your mouth, spit it out and call your doctor right away. Please keep ink cartridges out of the reach of children.